Zip-line construct with no trees
Disclaimer: Use your own judgement or consult an expert before installing your own zip line. This site describes my idea procedure, strategies, and execution. Install and use at your own risk.
So I wanted to build a zip line in my backyard butttttt my backyard doesn't have any trees, I looked around and couldn't locate directions for setting up a zip line with posts so I decided to write about it for all you newbs out there. There are several challenges with using posts.
Fist I grabbed a
DIY Zip Line Cable Kit from Ziplinestop.com
First is the height difference. Predicated on the directions that came with the kit, for the 60 foot jog, the zip line desires around 30 inches of height difference. The beginning height ought to be about 102 inches as well as the finishing height would be about 72 inches.
I utilized a laser level (SKIL MT 8201-Self-Leveling Cross Line Laser) as well as a yard stick to gauge the difference in altitude between the beginning and ending of the zip line run in my backyard. Fortunately, I 'd around 22 inches of altitude change. What this means is that I just need 8 added inches of height differential for my setup.
Second is the tension in the cord. The kit uses 1/4" steel cable with a tension of 300 pounds with no load and 600 pounds maximum tension. It will be extremely tough to place posts in the ground which could resist that quantity of force without bending over and losing pressure.
I thought of two alternatives to the stress issue.
1. Brace the posts with struts or wire anchored to the ground.
2. Anchor the cord anchor to the in the ground on both ends and go over the posts with pulleys.
I selected option 2 since it looked simpler to execute.
It's obvious that a lot of the tension is tolerated by the concrete anchors in theground because the posts are subjected to a bending force that is dependent upon the angle of the cable as it turns across the pulley. The farther away from the post the anchor is set, the less bending force (and total force) on the place.
This layout can be further enhanced by angling the posts away from each other by 5 or 10 degrees.
Here is the starting pressure treated lumber post for the zip-line. I used two ground anchors which join together and attach to the wire. The first anchor position was not in line with the zip-line and it caused too much lateral force on the pulley
resulting in a broken pulley
. I used the second ground anchor to properly align the system. The horizontal section of chain 2/3rds up was used to increase line tension and balance bending forces on the post. Note that the post is angled backwards about 10 degrees from vertical. This also reduces bending forces.
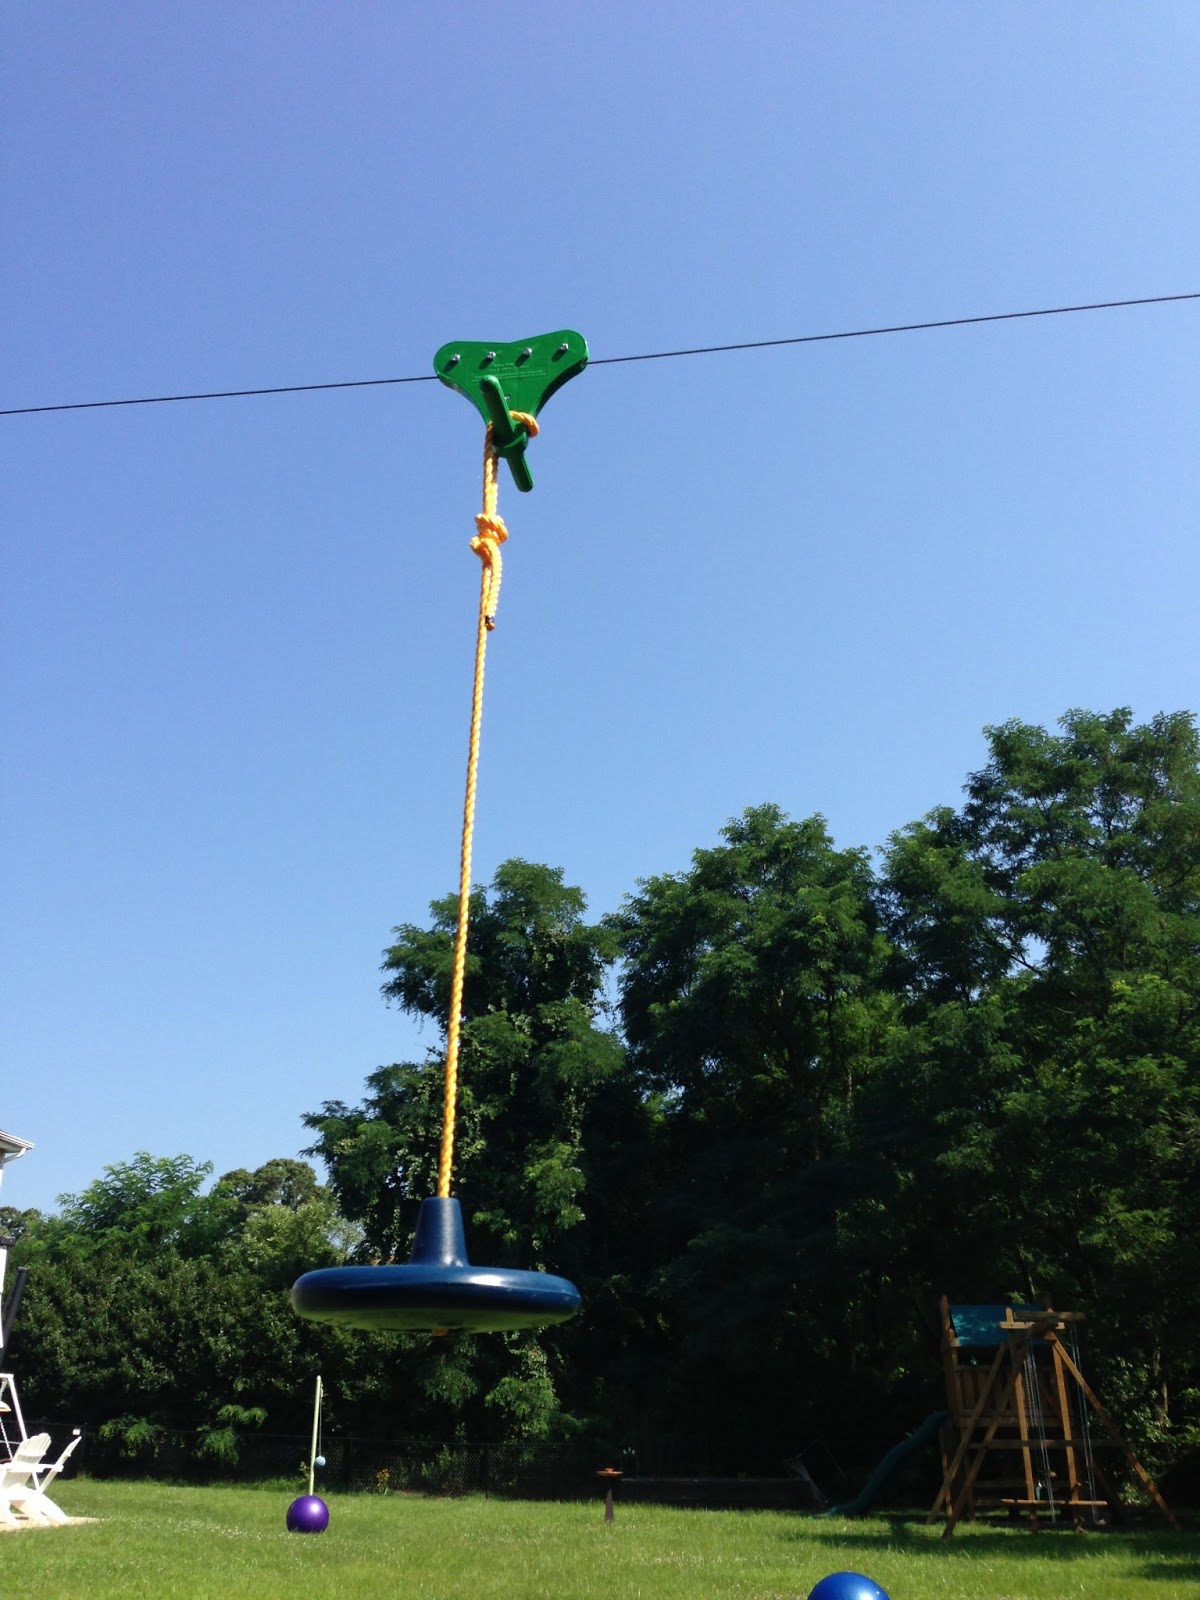
Here is the disk swing seat tied to the trolley of the
zip line.
Here is the end post of the zip line showing the pulley on top and the chain to the ground anchor.
I needed a pad to wrap around the end post so that the kids don't get hurt. I looked at pads for basketball poles but they were very expensive. I found a camping pad and wrapped it around the pole with the included straps. It is doubled over itself to increase thickness. It works great. I ended adding a few more straps to secure it better than shown in the pictures.
You can get a camping pad like this at Amazon
I used a 4x6" pressure treated wood post 12' length. The hole was dug approx 4-1/2' deep, 2' across and 2' wide. A small amount of crushed stone was placed at the base and impacted. Then the post was set. It was angled away from the opposite post 5-10 degrees. Then the crushed stone was placed and impacted around the post using a 2x4 and bricks. The stone was finally covered with dirt and grass.
This is my design for a concrete anchor to hold the tension of the zip line. I don't know how much weight this design can hold. It probably depends on ground conditions, depth of hole, geometry of hole, amount and type of cement, amount and type of rebar, and chain size and orientation.
I dug a hole about 2 feet deep, 3 feet across, and 2 feet long. I tried to make sure the base of the hole was wider than the top of the hole. Two rebar rods were impacted in the base of the hole angling away from the chain direction as shown. A third rebar rod was threaded through the last link on the heavy chain and placed behind the upright rebar rods. This arrangement is able to hold tension without any cement. Next, two 80 pound bags of concrete mix are prepared and poured into the hole. Dirt is packed on top of the anchor once the concrete sets.

I researched options for posts for the zip line in the net. At first I thought I would use pressure treated wood and put them in concrete. It seems that the wood will rot and the concrete may crack. Most people suggested placing the posts in the ground filling the hole with crushed stone. This allows the wood to stay dry and not rot. Since the posts are not subjected to high bending forces in my design, I thought this would work well. The other bonus is that it is easier to remove the posts if they are not cemented in the ground.
Parts List:
Zip Line Kit From Zip Line Stop. This one is made for kids but can hold up to 225 pounds. It comes with the trolley, cable, and most of the hardware that I needed. Cost $229
Alien Flier R100 kit
4x6" x 12' Pressure Treated Timber. Cost about $25.00 each from Home Depot.
Koch 3202093 2 Cable Block Fixed Flange, Zinc Plated Pulleys from Amazon. I bought 2 at first but needed an additional one to handle the high force on the starting side. Cost $6.99 each as of 7/18/2013.
Concrete - I used 4 bags of Sakrete 80lb Concrete Mix - $4 per bag at Home Depot
Six 1/4" Stainless Steel or Zinc Coated Anchor Shackles - about $2-4 each from Home Depot
1/2" Rebar for the cement anchor, I cut it up into 2-3 foot sections and used 2 pieces per anchor for a total of about 12'. Cost about $15-$20 total depending on where you buy it. I had some pieces lying around from a previous project.
Steelworks Boltmaster #4-1/2X72 Rebar 11804 Rebar W/Smooth Rods
Since the cable can break at the loop, I reinforced the loops with thimbles for added security. The kit had one so I bought one for the other end of the cable.Koch 143121 Wire Rope Clips and Thimble for 1/8-Inch Cable, Zinc Plated . Cost $4 on Amazon as of 7/18/2013.
It is very hard to get the proper initial tension by hand. The final tension is set with the turnbuckle which comes in the kit. I used a ratcheting cargo strap for this. Cost $19.10 for a set of 4 from Amazon as of 7/18/2013.


Looking for something else super awesome that is street legal check out the Ice Bear Scooter. It's a super cool gas powered scooter that is street legal. The site also offers free shipping on all orders. Ice bear has a long history of reliability and performance so you don't have to worry about durability. They also come in a whole array of different models and sizes. Check them out at


Comments
Post a Comment